Create and fund a tender
A buyer defines what is being purchased and the rules under which proposals will be evaluated. The first target users are small DAOs and ecosystem teams hiring digital service providers, such as security reviewers or integration developers.
Before you begin
Use a supported NEAR testnet wallet. The current connector supports Meteor on testnet; a wallet must support the NEP-413 message-signing flow used for private reader keys. You need testnet NEAR for gas and deposits, and the configured tUSDC token for escrow. The app does not mint tokens for visitors.
Decide the scope, deadline, eligibility rules, budget, criteria weights, committee accounts, approval threshold and refundable bid bond before publishing. The current contract accepts at most five active bids per tender. Review the security limits before relying on the prototype.
1. Open Create tender
Go to Create tender. Follow the form's steps to define the scope and evaluation rubric. It shows the rubric JSON and its hash before you submit.
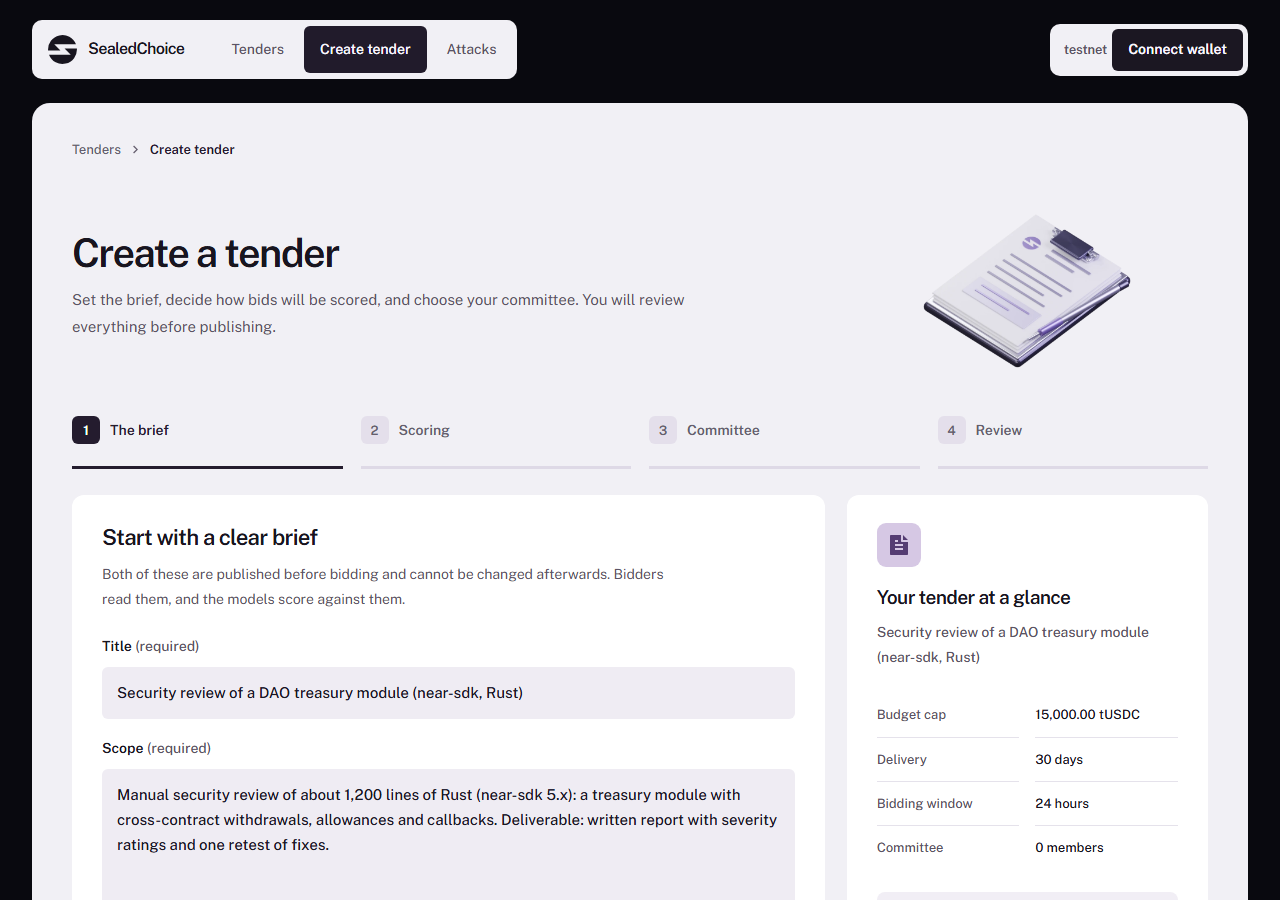
The weights use basis points and must total 10,000. Each text criterion has score anchors from 0 to 5. Models read only the allowed proposal text fields. They do not receive the structured price field.
2. Register committee readers
Each committee member needs a valid report public key for the private committee report. The account holder derives it through a wallet message signature. Supply the resulting public key to the buyer; never share a private reader key or wallet secret.
The contract checks the account, approval threshold and public keys when the tender is created. See committee access.
3. Review and publish
Check the exact rubric, committee, deadline, bond and evaluator reference. Creating a tender fixes these values for that tender; there is no rubric-editing step after creation. Approve the wallet transaction and keep its receipt.
The tender starts at PendingKey while OutLayer derives its public key. It then becomes AwaitingFunds. A pending wallet approval or transaction is not completion; use its transaction link and refresh the tender after finality.
4. Fund the escrow
Transfer the exact budget through the app's funding action, using the configured token. Funding is a separate NEP-141 ft_transfer_call transaction. After the key and escrow are ready, the tender becomes Open.
The contract rejects a wrong token, sender or amount. Do not send tokens directly to the contract as a substitute for the funding workflow.
5. Share and close
Share the tender URL with suppliers. They can read the rubric before connecting a wallet. Bids must reach the contract before the published deadline; starting a wallet approval before the deadline does not reserve a slot.
After the deadline, anyone may trigger closing. The contract freezes the active bid set, computes its Merkle root and requests evaluation. The same tender can accept only one evaluation result. Failed execution attempts are recorded and capped at three, with a delay before retrying.
6. Follow the award
The committee reviews the evidence and decides the award. If it selects a lower-ranked eligible bid, it must record a rationale. The winner accepts before the acceptance window expires. The contract pays the award from escrow and returns the remainder to the buyer.
If something goes wrong
Use the timeline and transaction receipt to distinguish a pending transaction from an on-chain failure. Do not repeat a funding action just because a page has not refreshed. Terminal failures and no-bid outcomes have their own refund rules; see the contract lifecycle. Model or RPC availability can delay progress.